
This Crusty Sourdough Bread recipe produces a loaf of bread as good as any artisan sourdough bread I’ve had. I started making sourdough bread last year, using sourdough starter I bought from King Arthur. However, you can just get some from a neighbor or friend who has sourdough starter. I’ve been sharing my sourdough starter with people in my community who want to try making sourdough bread. This recipe has no yeast, so you simply need sourdough starter, salt, flour and water.

The key to a good sourdough starter is to feed it consistently, either twice a day if you keep it at room temperature, or once a week if you keep it in the refrigerator. I store mine in the refrigerator, loosely covered so it gets some air. Once a week, I take the starter out, feed it and let it sit at room temperature until bubbles form on the surface. I typically measure off 4 ounces of starter and add 4 ounces of water and 4 ounces of flour. My starter seems to like whole wheat flour a lot and bubbles up better when I feed it that. The remaining starter is called “discard.” I don’t throw out the “discard.” Instead, I use it to make pizza dough or other bread. Even better, I’ve been giving it away so others can try their hand at making sourdough bread.
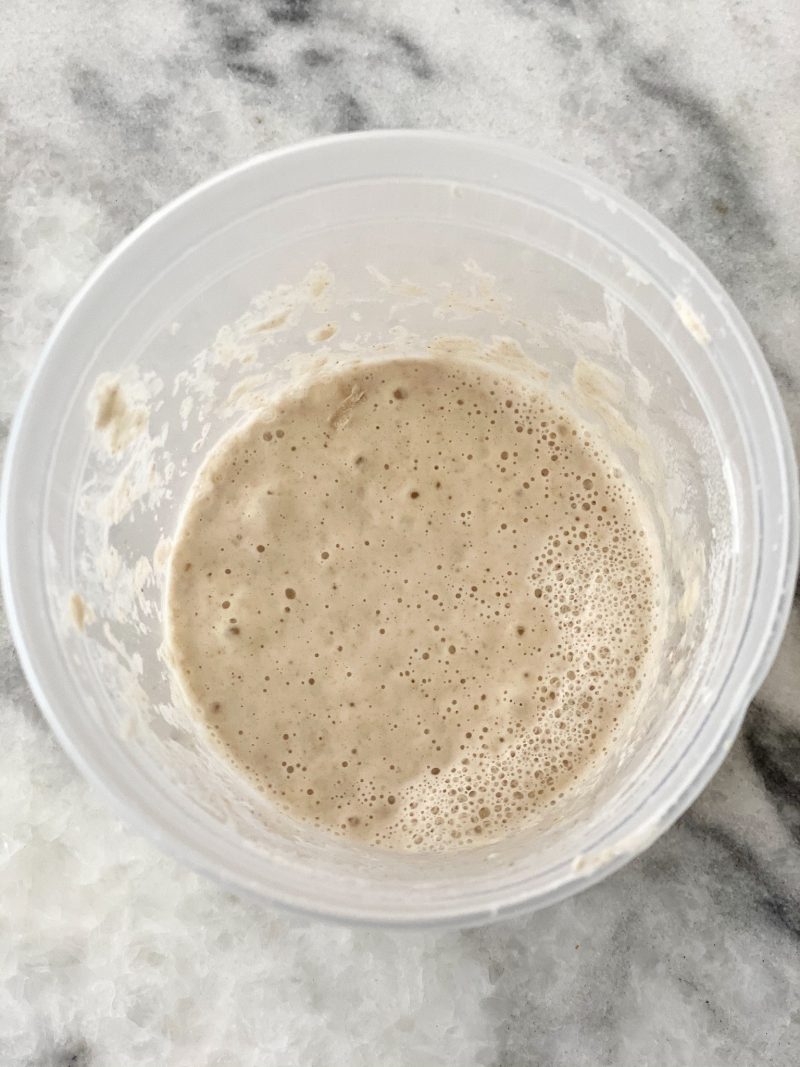
This sourdough bread recipe was shared in a local virtual cooking/baking group that I joined. The recipe has no yeast, and relies completely on the sourdough (wild yeast) to help the bread rise. The ingredients are simply sourdough starter, salt, water and flour.

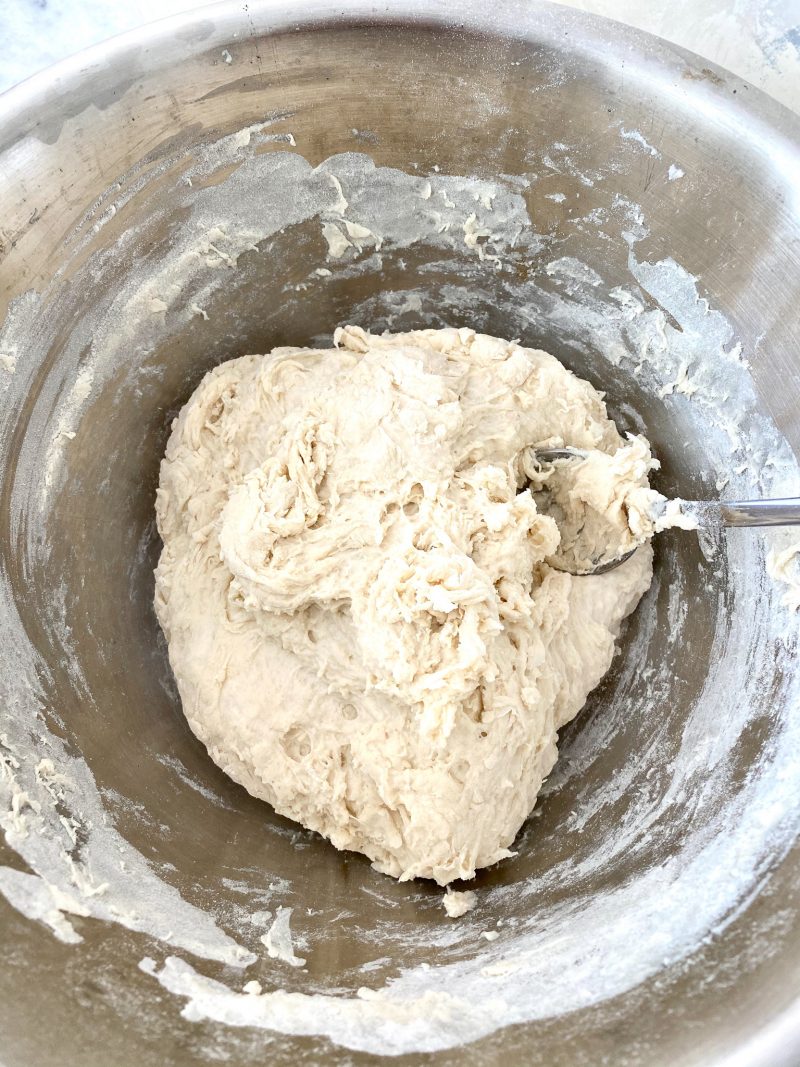
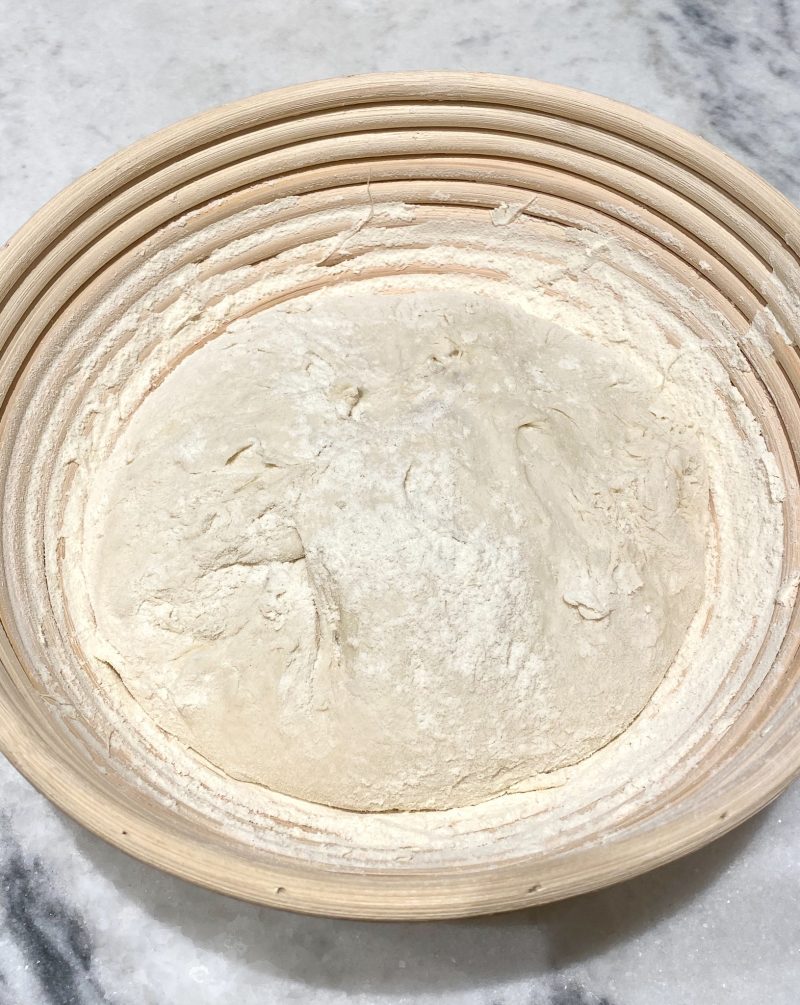
The first step is to mix the sourdough starter with water and flour, and let it rest for 1/2-1 hour for the flour to get absorbed.
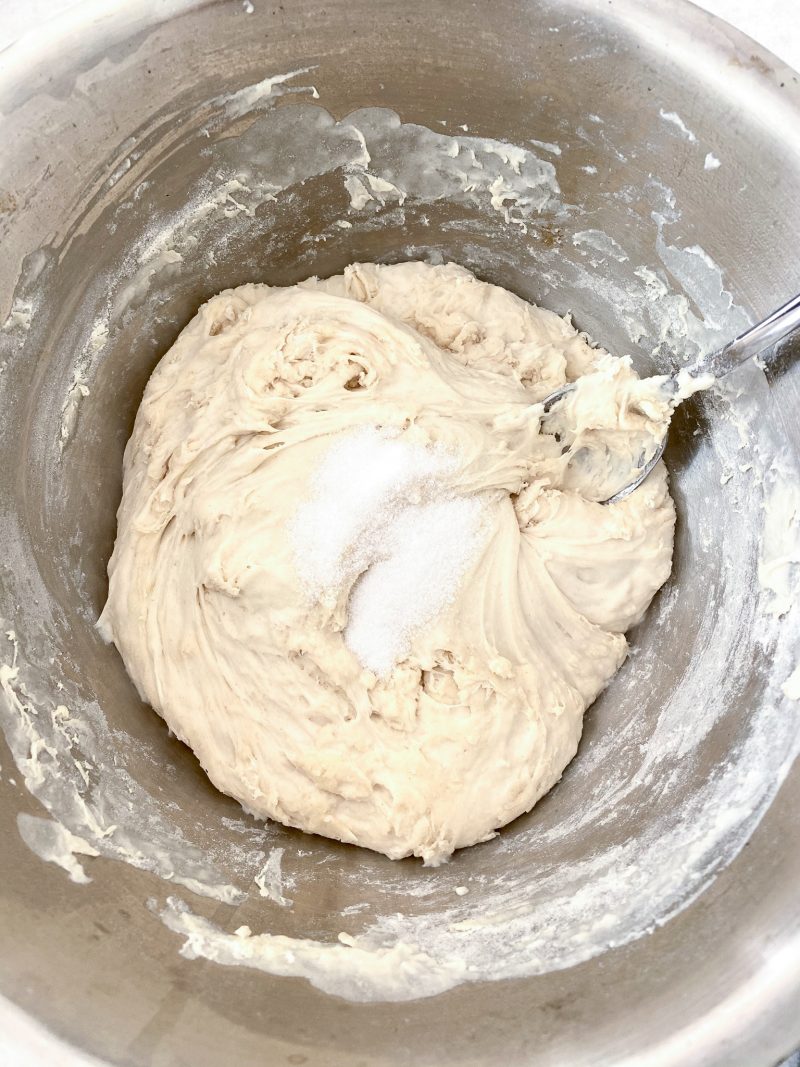
Then the salt is added and mixed in.
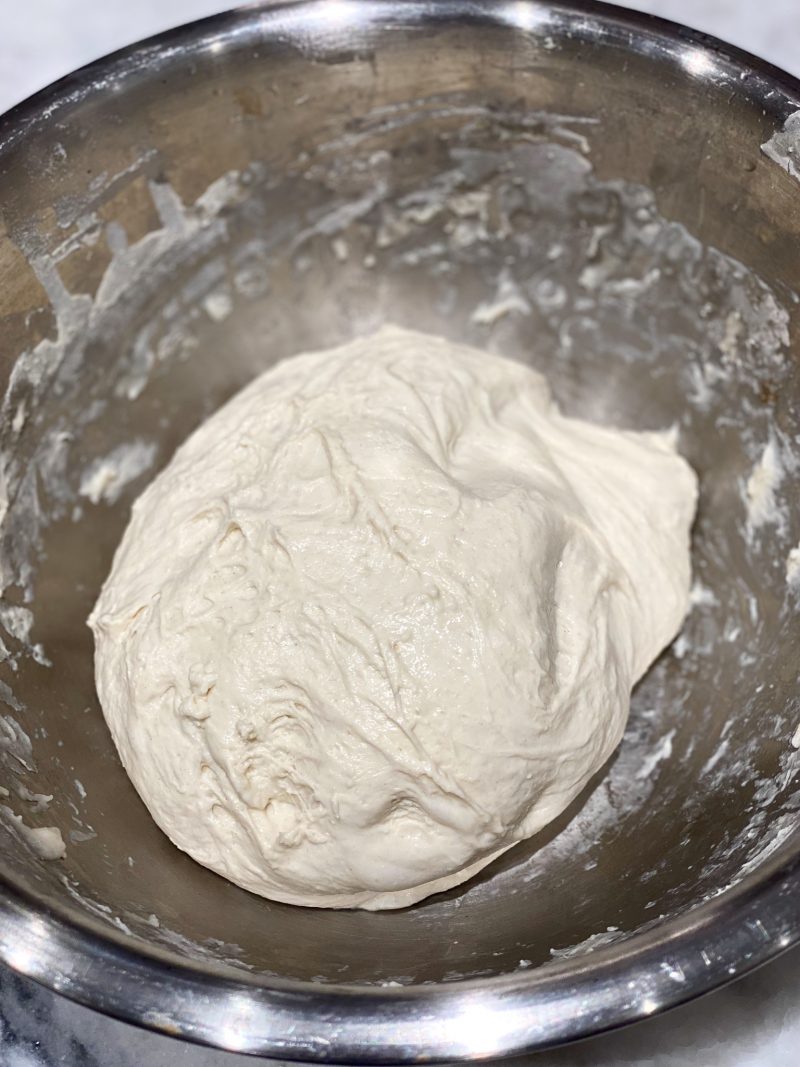
After the dough rests 1/2 hour, start folding the dough 4 times every 1/2 hour, turning the bowl a quarter turn as you go. The dough will become less sticky and more elastic-ky.
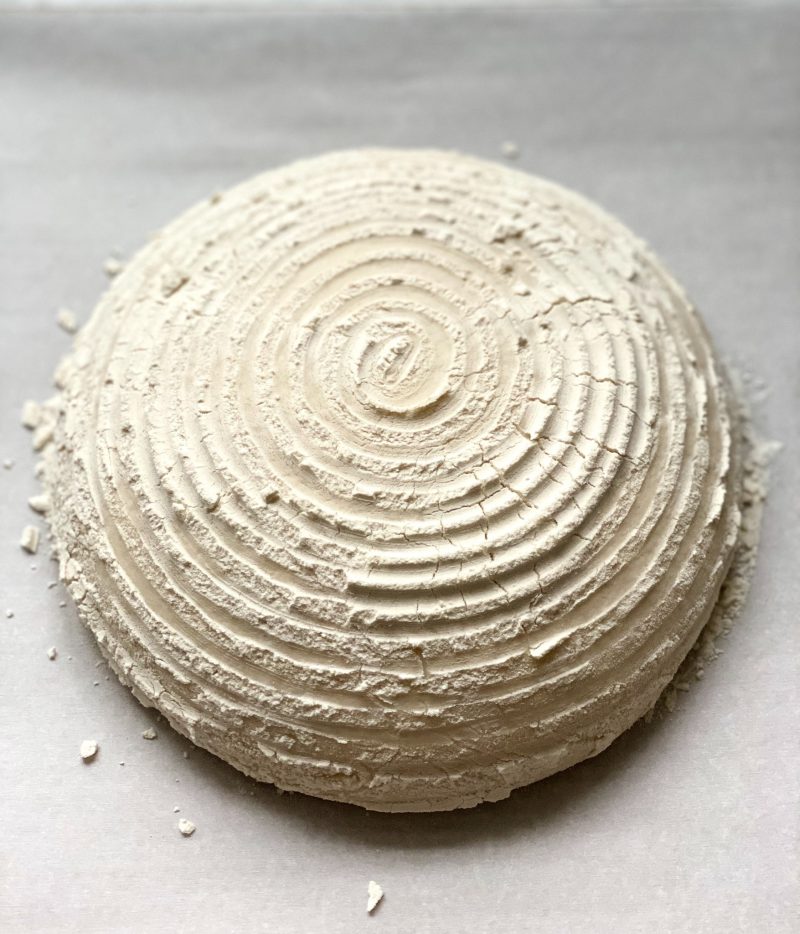
If you want an artisan looking loaf, you can invest in a banneton, which is a basket that you can proof the dough in and gives it a nice coiled look.
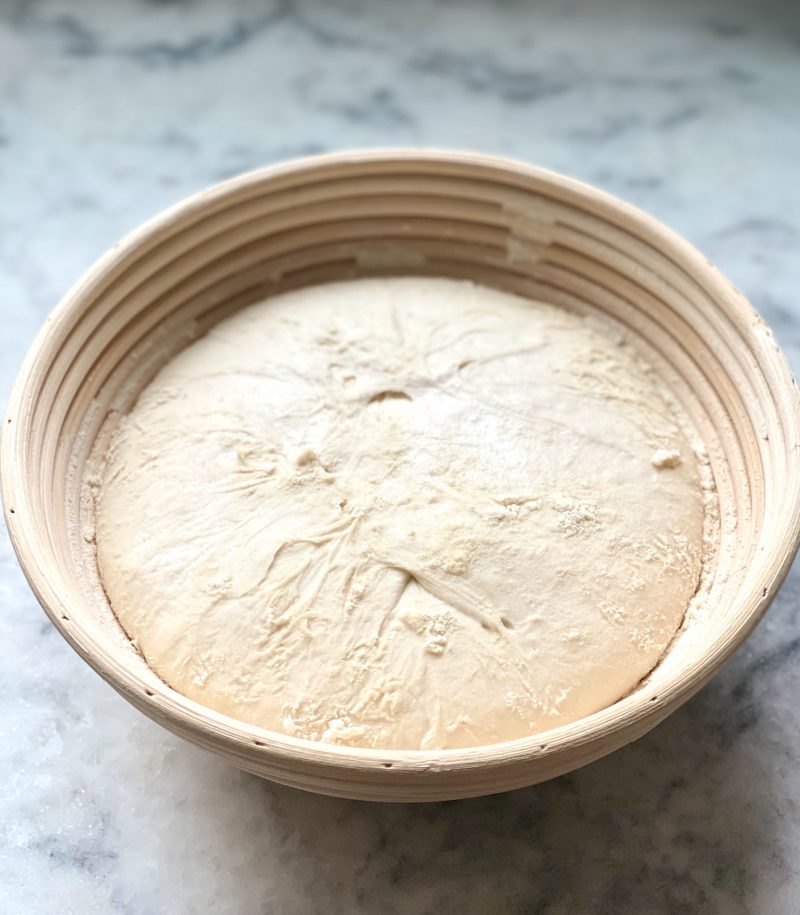
Cover the banneton and refrigerate the dough overnight (12-24 hours). This is what my dough looked like the next day.

I let the dough sit out at room temperature another 2 hours.
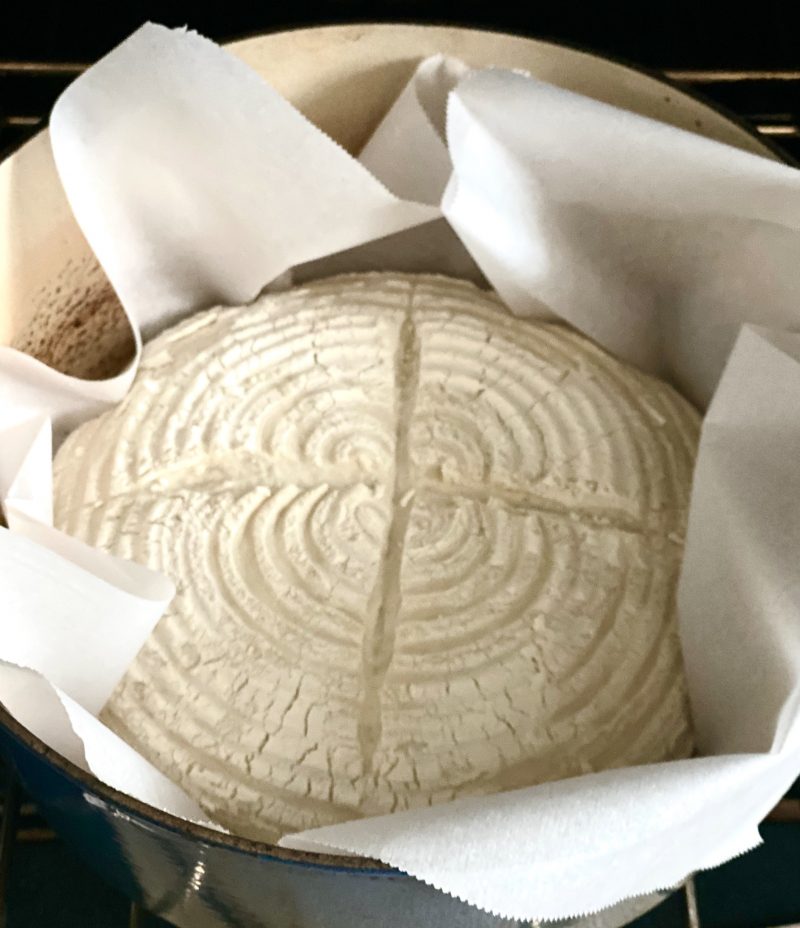
Turn the dough out onto a piece of parchment paper. Isn’t it pretty?
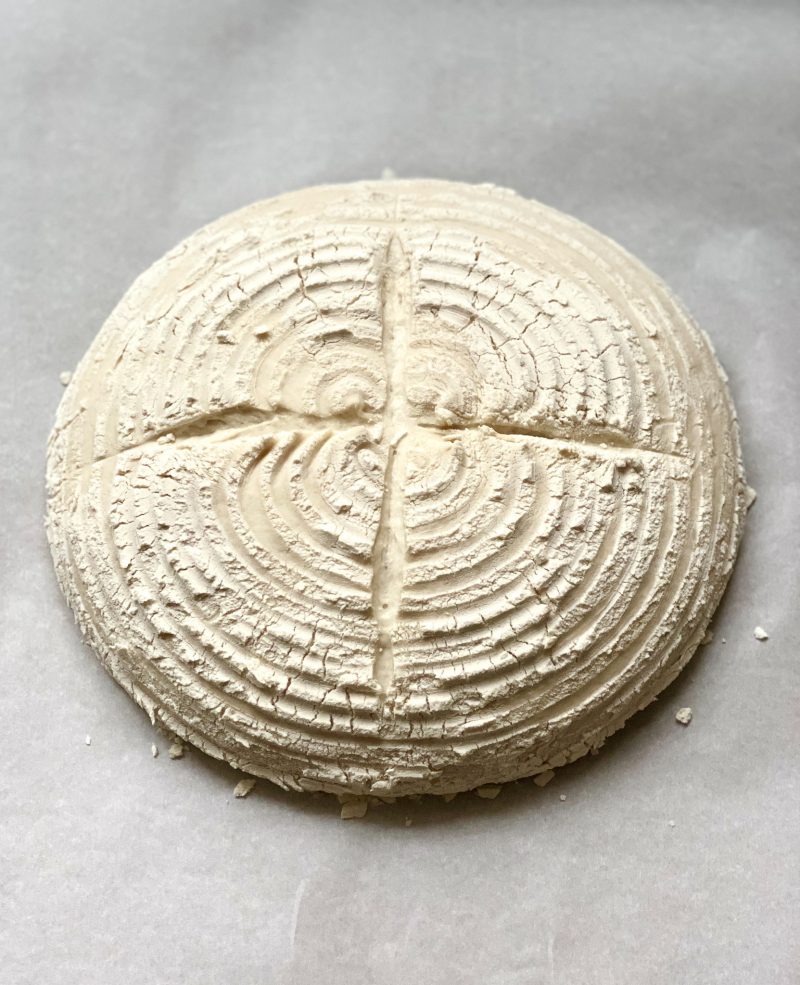
Score the top of the bread with a sharp knife or razor to allow it to expand during baking.
Carefully transfer dough on parchment paper to a pre-heated cast iron Dutch oven (I used a 5 quart pot).
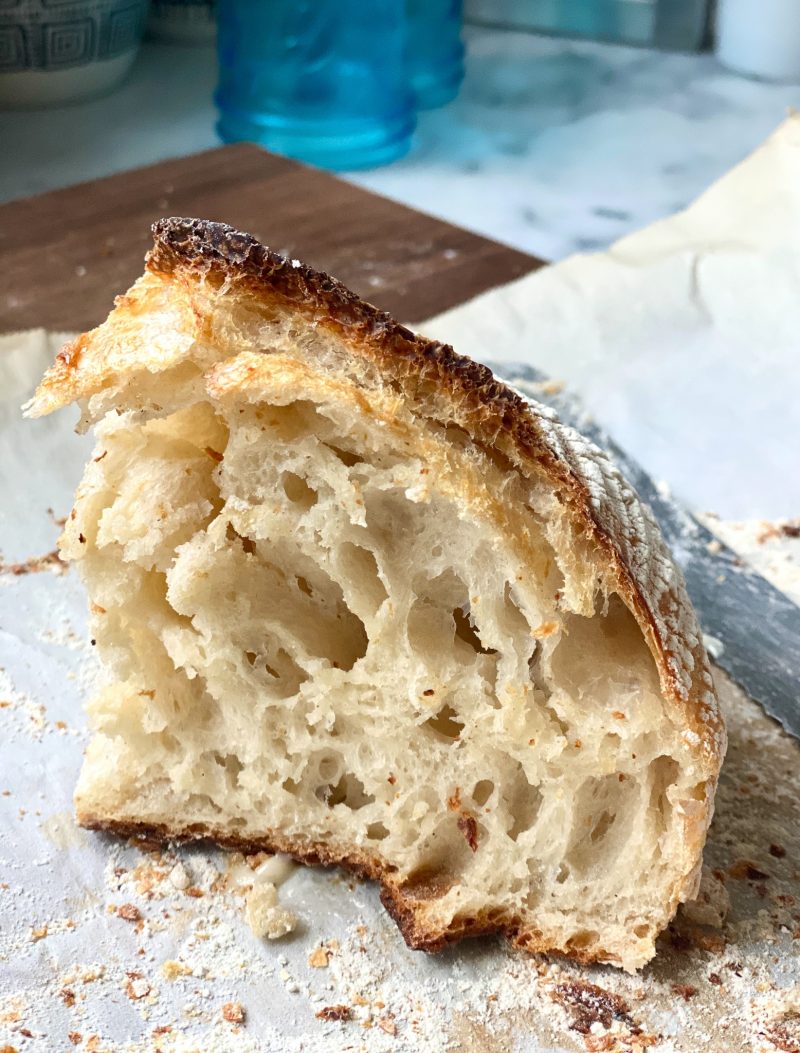
Bake for 30 minutes with the lid on top; then 20 minutes without the lid. Look how beautiful my sourdough bread came out! A Dutch oven helps steam the bread when covered (for a beautiful crumb), and provides the perfect baking environment for bread (for an amazing crust).

It kind of looks like an owl.
What I was most impressed by were the open pockets inside the loaf.
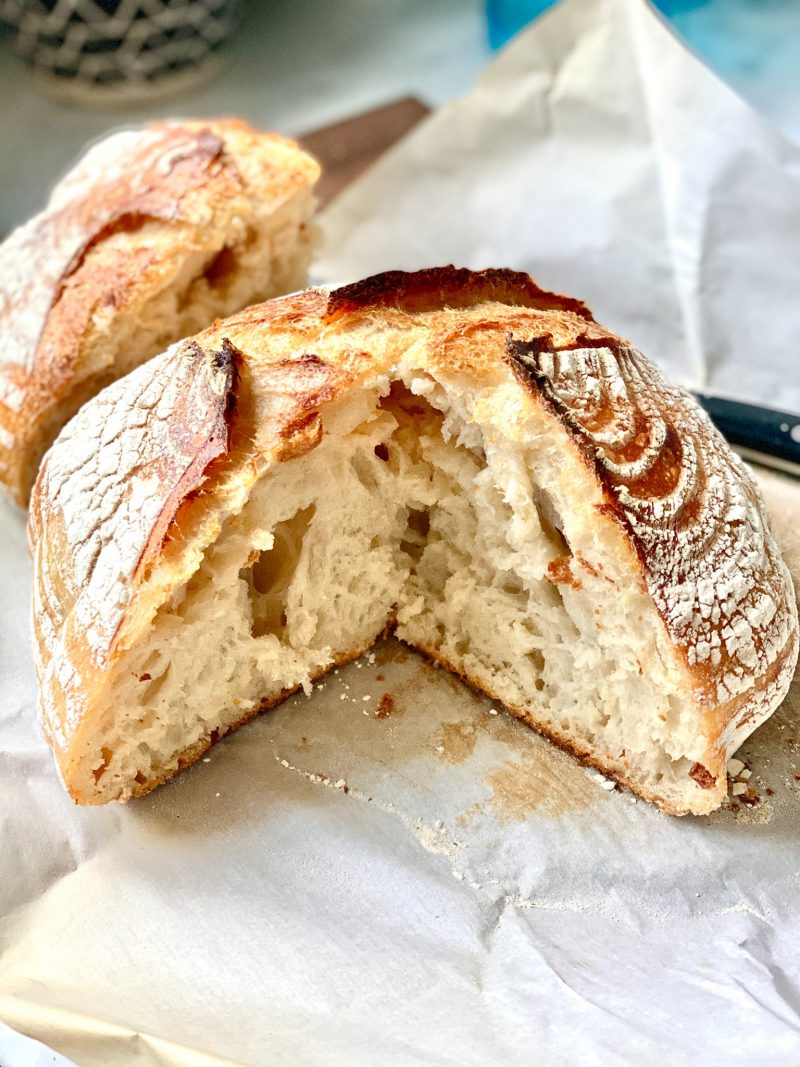
You’re supposed to wait until the bread cools before cutting into it, but we couldn’t resist!
Planning Ahead To Bake Sourdough Bread
The first time I made this bread, I was hoping to serve it for dinner. Unfortunately, I didn’t account for all the rising time needed to produce a beautiful loaf. Patience is everything with this recipe. It is worth every hour. The key is to use an active sourdough starter, and let the dough rise sufficiently so you get a beautiful crumb.
Now, if I’m planning to serve this bread for dinner, I usually start making the dough the day before in the afternoon or early evening. The actual hands-on time for making this bread is probably only about 30 minutes. But, it takes 24 hours of proofing (including overnight in the refrigerator), so plan accordingly.
The first day, the dough requires about 4 hours of resting/rising time. So, if you want to go to bed by 11PM, start no later than 6PM.
Then, the dough proofs overnight in the refrigerator. About 3 hours before you plan on eating the bread, remove the dough from the refrigerator and let it sit at room temperature for 1 hour while the oven and dutch oven heat up. The bread should cool before cutting into it, so allow some cooling time too (of course, if you’re like me and can’t resist, don’t worry about this but the inside will be soft and hard to slice through). So, if you’re planning on serving this bread for dinner, take the dough out from the refrigerator by 2PM and preheat the oven. Start preheating the cast iron pot at 3PM (it needs to preheat for 1 hour). A pre-heated cast iron pot ensures an incredible crust. Bake the bread starting at 4PM. It takes 40 minutes-45 to bake.
Crusty Sourdough Bread
The pre-heated dutch oven provides the perfect environment for this crusty sourdough bread with a beautiful crumb
Ingredients
- 50 grams bubbly active sourdough starter
- 375 grams warm water
- 500 grams bread flour
- 9 grams sea salt
Instructions
-
Mix the starter and water then add to the flour and roughly hand mix until all flour is absorbed. Let it rest for 1/2-1 hour.
-
Add salt and hand mix into dough. Let rest 1/2 hour.
-
Stretch and fold dough, turning bowl 1/4 turn each time (4 turns). Let rest 1/2 hour.
-
Repeat stretching and folding dough 4 times every 1/2 hour. Turn dough out onto lightly floured surface and form a ball. Let rest 1/2 hour.
-
Form dough into a smooth ball by cupping your hands and turning the dough.
-
Place in a heavily floured banneton, seam side up. Alternatively, place dough in a colander lined with a tea towel seam side up. Cover with plastic wrap and let rest on counter 1 hour. Place in refrigerator overnight (12-24 hours).
-
Remove dough from refrigerator and let sit at room temperature for one hour while the oven and dutch oven preheat (leave the plastic wrap on).
-
Preheat oven to 450 degrees. Place dutch oven (5 quart) in oven for one hour to preheat.
-
Flip dough out onto parchment paper lined baking sheet. Use a sharp knife or razor to score the top of the bread.
-
Carefully, lift dough and place in hot dutch oven. Cover with lid and bake 30 minutes. Then, remove the lid and bake another 20-25 minutes until the top is nicely browned. For a deeper brown crust, turn off the oven, crack the oven door open and let the bread sit in the oven another 20 minutes.
-
Remove bread from pot and let cool before slicing.
Recipe Notes
Adapted from Emilie Raffa's Artisan Sourdough Made Simple
Resources:
Feeding Your Sourdough Starter


Leave a Reply